Saturday, December 7, 2019

Sweet Advent

I hope all of you have an Advent season filled with joy.  May everything you do be done with love.  We are celebrating a birthday!  Try not to over-extend yourself...if it is not fun for you, don't do it!  Our expectations of Christmas can be difficult to achieve, so simply try to enjoy the moment, the delight of children, and your own love for those around you.

Blessings of the season to all of you...warmly,  Beth

Saturday, October 5, 2019

Public Service Announcement


If you have bookmarked some of my early tutorials that were picture tutorials on Flickr, they will disappear FOREVER on November 4.  The one tutorial that has probably been the most popular is the Waldorf Wig Making tutorial.  You may wish to download the images to your computer to save them.  I may, in the future, create PDF versions of these tutorials, as I have all the images on Dropbox, but don't really feel like doing it right now.

We'll see.  If there are several people who want/need a particular tutorial, I will create one.

Edit 10/12/2019:  Thanks to Dawn Smith, the wigmaking tutorial for Waldorf (or any) dolls has been turned into a .pdf file.  Now when you open it, it should allow you to download this file, instead of taking you to Flickr.  Yay, Dawn!  and thank you!!


Sunday, September 29, 2019

You CAN take it with you...dollmaking, that is.


A magic box!  All the needful things to make button and spool dolls.


Painted head beads, some tea dyed beads, spools, scads of buttons (someone went to Michaels....), stringing material.  Just need to remember to take some scissors.


And Christmas is just around the corner...honestly!

Tuesday, September 24, 2019

Happy Halloween!

Sweet Hemlock and Caspar the cat wish you a Happy Halloween.

The cat is from the Tiny Window Cat pattern on Ravelry, the rest came out of my head :-)  The pumpkins are just wood beads with a dowel stuck in them to look like a stem, then painted as pumpkins.

The stand was made in the post before, with a little preserved moss glued to it.

And Hemlock is a Spool and Button doll in a witchy outfit.


Friday, September 20, 2019

Fun hacks for your button and spool dolls


A couple of fun hacks for your button and spool dolls.  The first is a simple stand, since these girls are a bit wobbly on their feet.  You need some 20-22 gauge wire and a wood disk or plaque.  These were purchased from Michaels.  In a pinch you could use cardboard.  If using cardboard, cut a couple pieces and glue them together for added sturdiness, then when done you could cover it with felt.

This plaque is about 2 inches in diameter and 1/2 inch thick.  Take a pair of pliers and make a spiral at one end of the wire, about 3/4 of an inch in diameter, then cut the wire leaving a long straight piece 2 inches long.  Bend this straight piece up perpendicular to the spiral.  Put a puddle of glue in the middle of your wood plaque, then put the spiral base in the puddle and let it dry.

When dry, you can decorate the plaque with more buttons, little toys, ribbon, flowers, whatever!


Hack number two...did you know you can tea dye wood?  The bead on the right was dunked in VERY strong black tea for about an hour (along with the wood spools to make the doll), and this is the color it turned, as compared to the natural wood.  I love this, as I don't really like painting or staining these tiny parts.


And so my brigade of button and spool dolls continues to grow!

Sunday, September 15, 2019

Spool and button doll fun


One idea seems to lead to another, and suddenly I'm making spool dolls again!  Ages ago, I bought a kit from Magic Cabin Dolls (the kit no longer available, sadly) for making a very cute doll from wood spools and beads.  I made one, then it got modified slightly, and before I knew it there was a small army of spool dolls all over the house.  That was at least two decades ago.

Fast forward to today and Pinterest and the addition of buttons and suddenly, I want to make these dolls again.  I found one simple set of free directions at this link:

Cotton Reel Creations

which is very like the Magic Cabin Spool doll.  Simple and a bit rustic and quite adorable.

I also worked up my own pattern that incorporates buttons, and different hair:

Spoolie and Button dolls

Here is a quick peak at what these dolls look like:

Ingredients and beginning stringing


All strung up!

Lots of options!

I like all the dolls I make to be dress-able, so the pattern includes a crochet bodice that you can either continue crocheting a skirt to, or add a fabric skirt to it.  If you'd rather, you can gather a fabric skirt to the doll and attach it permanently and put the crochet bodice over this.

You can make these dolls any size, depending on the spools and beads you use.  Mine are about 3 3/4 inches tall.  You can use buttons, or not, the same with the pony beads.  I like the beads and buttons as they add a bit of bling to the doll, but if you prefer a more rustic look you can stay with just the wood beads and spools.

Our Grandmothers and Great Grandmothers probably made simple dolls like these for their girls, from used cotton thread reels and buttons from worn out shirts.  I love the idea of walking in these women's footsteps.

Enjoy!

Wednesday, September 11, 2019

Sunday, September 1, 2019

Crooked Cottage


I spent the better part of August working on this little cottage for the tiny bead dolls.  Amazing how insistent a tiny doll can be!

I love using cardboard, partly because my woodcrafting skills are nill, and partly because there is so much of it around for free.  And, making dollhouses keeps it out of the landfill.

This wee house was made from one cardboard box, with a couple of strips of cardboard glued to the side to make a ledge for the second floor.


There is always an incredible mess when I start playing with cardboard and glue and paper and paint.  This is laid out on the floor, and you can see the basic doll house shape already done.  I painted the entire thing with gesso, then used scrapbook papers to paper the inside walls, and sponge painted a fern green to the outside walls.  The floors are carpeted with felt, and the roof is shingled with old dollhouse shingles I've had for decades.


You can see the sponge painting on the sides; striving for a look of moss on stucco, and the shingles glued to the roof.  I tried to glue long twigs to finish the raw edges of the house, but the glue wouldn't hold.  In desperation, I looked around for another way to fasten the twigs to the house, and found some waxed linen used for macrame jewelry that I could tie the twigs to the raw edges.  I used a pinvise to drill tiny holes in the cardboard and threaded the cord through these and around the twigs.  If you look at the picture below, you can see what I mean (better than my trying to describe it).


A bit crooked, but sweet.  And quite a mess!


Tiny furniture for our tiny house; chairs and a bench from wooden blocks and twigs; table from spools and wood cut-out; quilt on a bed from spools, twigs, and a piece of cardboard.


Something to hang on the walls!


Living room, furnished.


Bedroom furnished.


A bit cozy, but we're happy.  And so is the owl in the attic!


And looking a bit spooky with some camera manipulation.

I just grabbed and box and started playing.  Bet you have plenty of boxes to play with as well.  The wood bits are easy to find at the craft store, and the twigs came from our own tree trimmings ( a brush pile is a wonderful thing).  It is great fun to make something from nothing!

Friday, August 23, 2019

Knits for your tiny tribe

Knitting does not come naturally to me, but I love it just the same.  Tiny knit sweaters have a sort of magical charm, so I made some for my tiny tribe.  I used fingering weight yarn, and size 00 needles.  About as tiny as my fingers and eyes want to go!

The girls also wanted a knit sundress and rompers, which are basically the same pattern, with a divide for the legs for the rompers.  These patterns are all included here, if you want to make some tiny knits.  The only ones that require dpn's are the pullover, and the long sleeves on the sweater.  I used dpns on the skirt of the dress, but it could be made flat and hemmed up; the legs of the rompers are really easier to make on dpn's.

Knits for tiny tribe

Have a delightful dollmaking day!

Wednesday, August 14, 2019

Liberty and Justice for All.


"Give me your tired, your poor, your huddled masses yearning to breathe free, The wretched refuse of your teeming shore. Send these, the homeless, tempest-tost to me, I lift my lamp beside the golden door!"

Do these words only apply to whites of European ancestry?  Read them carefully.  If they do not apply to all, then this country has lost its soul.

Monday, August 5, 2019

Bead and Dowel dolls revisited


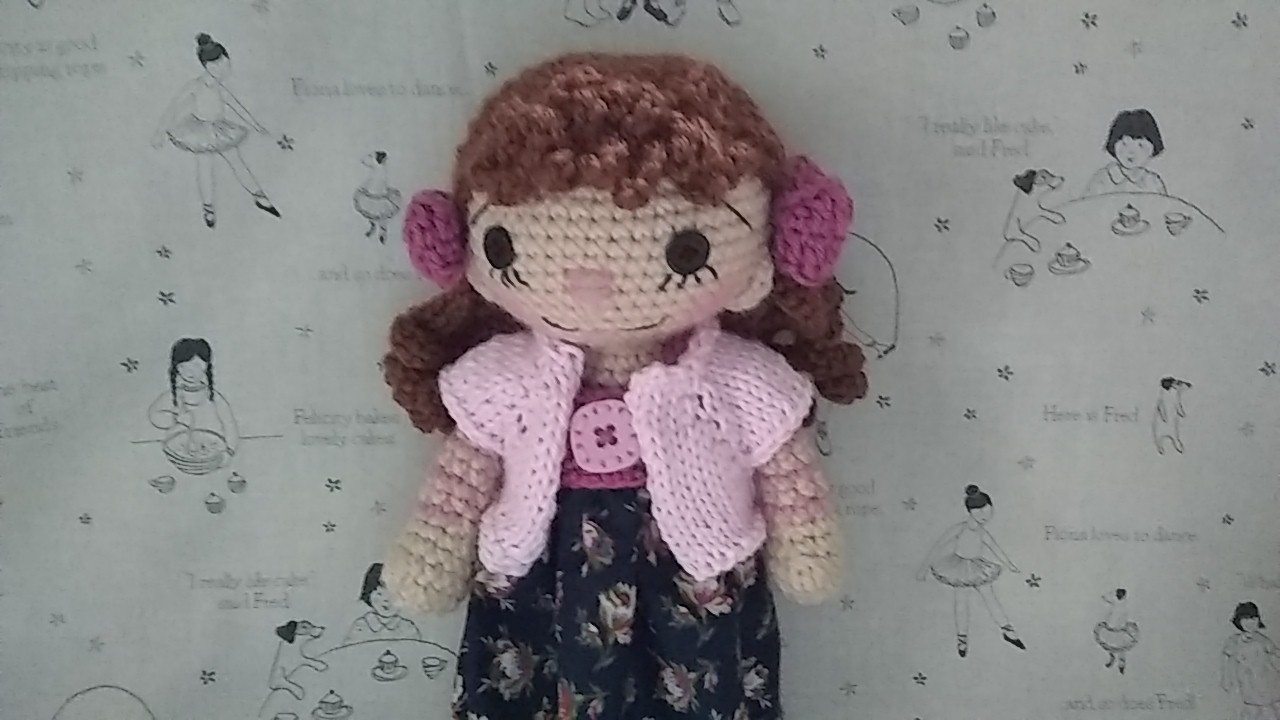
About a year and a half ago, Joyce and I collaborated on a doll design that used wooden beads for the head, dowel rods for the limbs, and a very simple crocheted body.  The doll was about 5 1/2 to 6 inches tall, and a nice, slender companion to Hitty.  You can find the pattern here:

Hitty bodied peg doll

Some Facebook inspiration got me interested in making a tinier doll, that could stand on her own.  So now, I have another pattern to share, for this little bead and dowel mite.  She stands (on her own!) right at four inches:

Tiny bead and dowel doll

The pattern includes, hopefully, all the tools you will need to make this doll.  In addition, there are patterns for four different wigs made from fingering weight yarn and a size B crochet hook:


And three different outfit plus a sunhat, made with size 8 perle cotton and a size 6 steel hook:


You can use the nightgown bodice or the camisole to make a sundress, and I have some other ideas for outfits in the making.  Here is a list of what you will need to make the doll.  This list looks long, but these are pretty simple tools and supplies.  Hopefully you can get them at your local hobby shop, or if not, they are available online:

Materials, for the doll: 
-An exacto knife for very minimal shaving of the wood dowel and spools
-Small saw and miter box for sawing the dowel rod pieces
-Pin Vise (tiny hand drill) for drilling the dowels to string the limbs to the body.
-200 grit (fine) sandpaper for minimal sanding
-Black paint for eyes and boots
-Pastels in shades of pink for blush
-Modge Podge to seal wood pieces
-Glue
-Toothpicks for painting eyes.
-20mm (3/4inch) wood bead with at least 3/16 inch hole
-One 12” long ¼” diameter dowel rod for body support, arms and legs (will make one doll)
-Two ½ x ⅝ inch spools for boots
-Strong craft thread for jointing the doll’s limbs
-Four  ¼ inch buttons for jointing the doll’s limbs
-Size 3 crochet cotton to make the body
-Size B crochet hook.
-Embroidery needle that will fit through the holes drilled in the dowel rods.

-Craft or carpet thread.


I'll end this post with my favorite picture. I love making dainty undies!

Friday, June 28, 2019

Calm the mind; make a doll


Time to return to what I love, and love to share!  Raggedy Anns have always been a favorite of mine...I made several cloth Raggedy's several years ago.  But my true love is crochet, and I found a wonderful pattern to use as a base for all of these Raggedy girls!  The pattern for the basic doll is freely available on Ravelry here:

Kelli Newcome's JJ Doll

JJ is about 8 to 9 inches tall, and Kelli has lots and LOTS of patterns for outfits for this doll.  She also has two other free basic doll patterns, Pookie and Petey.  Each one is incrementally larger than the next.  These dolls make up easy, as they are made in worsted weight yarn.   I turned them into Raggedy's by using button eyes (glossy, dark colored buttons work best), and Raggedy smiles.  If you are feeling adventurous, darken the area around the eye with a colored pencil dipped in water, then rubbed into the yarn with a clean cotton cloth:


That is what I did with this girl above.  You can find tons of Raggedy inspiration from Pinterest (of course!)

I also have a couple of patterns to share, that will fit Kelli's JJ doll.


JJ's Knit Sweater,  knit with worsted cotton yarn and size 4 needles.  The short sleeve version just needs straight needles.  If you want long sleeves, you'll need a set of dpn's.


And JJ's Crochet Undies,   Crocheted with worsted cotton and a size D hook.

A link to all of Kelli Newcome's patterns can be found here:

Kelli's Kreations

Make a doll, and make the world a bit better.

Monday, June 24, 2019

A Crisis of Conscience

This article from the New York Times impelled me to write to my Republican Senators and Democrat Congressman.  Read it, and please do the same:

https://www.nytimes.com/2019/06/24/opinion/border-kids-immigration-help.html

This is my letter:

In Germany of the 1930's, atrocities were committed, and the people simply ignored them, or believed they did not occur. And it escalated to a final solution that murdered over six million Jews, Gypsyies, Homosexuals....and others. Reading about children held in deplorable conditions in detention centers...another name for a concentration camp... I see the seeds of another Nazi Germany rising on our own soil.  Will we have the fortitude to resist? Or will we passively go along and become the monsters we defeated 75 years ago?

I am so sick at heart at the total lack of compassion, empathy, and Christian outrage at what our country is doing.  I implore you to do whatever you can to alleviate this suffering, and return us to our moral values;  values that this administration has trampled in the dust.

You must look yourself in the eye and ask...would you leave any child in these conditions?

Beth Webber

Update:

In the light of feeling helpless and hopeless regarding this atrocity, here is a link to suggestions you can do to help relieve the suffering.  And as always, write to your representatives in Congress.

https://www.elle.com/culture/career-politics/a21623492/children-separated-from-families-border-how-to-help/?fbclid=IwAR0bFbImKu0dGNoKKMAssmrPbXZbSJvOsifhjBorG_JRh8lJ8idSEy_s4RM

Monday, May 27, 2019

Memorial Day 2019


Today we in the United States celebrate Memorial Day. We remember the men and women of all creeds and colors that have been willing to lay their life on the line to preserve our freedom.

Thursday, April 18, 2019

Priceless Gifts


In my life, I've been given three priceless gifts: 

The first, from my parents, was my life and a childhood of love.

The second, from my husband, has been a lifetime marriage of love and loyalty.

The third, from my Grandmothers, is a heritage of women who use their hands to make beautiful and useful things. 

A heritage of quilters, knitters, crocheters, and seamstress's;  those who take scraps and make beautiful quilts.  Who take string and make sweaters and scarves to warm the cold, and dolls and toys to bring joy to children of all ages.  Who take thread, and make art.

Be thankful for the gifts you have been given, and show that gratitude by passing along the gifts you have to a new generation.

Tuesday, March 12, 2019

Cloth Doll Re-boot


The Hitty's Knitty group I belong to had a sew-along the month of February, making tiny cloth dolls.  I had forgotten how addictive and fun these tiny dolls are!  There are several patterns available to make tiny cloth dolls; most of the members used Ann Wood's Tiny Rag Doll.  She is a wonderful little five inch doll with a growing wardrobe.  Check out the link to Ann's pattern.  I've made this doll (many times!), here are a few of them:


Edith Flack Ackley made several patterns for doll house dolls in the 1930's.  Pattern replications are available on Etsy, or you can do a Google search and possibly find one for free.

Another way to make a tiny cloth doll is to reduce a simple rag doll pattern to the size you want.  I did this with my Prairie Flowers cloth doll and copy machine!  If your doll pattern makes a 10 inch doll, and you want a 5 inch doll, reduce the pattern by 50%.  Play around with the percent reduction to find just what you want.

To sew such a tiny doll, either by machine or hand, it is easiest to make sewing templates.  Using double sided tape, tape your reduced pattern to cereal box cardboard (a great way to re-use!) and cut out the pattern ON THE SEWING LINE.  Place the pattern on your doubled fabric, and use a heat disappearing pen to mark the sewing line all around the pattern (I like Frixon erasable markers by Pilot).  Since these dolls are so tiny, don't cut out the fabric, simple put it in your machine and sew around the line you've drawn, then cut out leaving a 1/8 inch seam allowance.  With this seam allowance, you won't have to clip curves either!


I made a couple of different cloth doll patterns by modifying a tiny Edith Flack Ackley pattern.  For one, I left the bottom of the torso open and made the head round (by tracing around a bottle cap), and for both of them I made separate arms to attach after the body is stuffed.


Something to keep in mind:  woven fabric (like broadcloth, muslin, calico) does have a bit of stretch in one direction. Pull your fabric along the grain in each direction to see which direction has the most stretch (don't confuse this with the BIAS stretch).  Depending on how you lay your doll out, she will be taller and thinner (stretch running the length of the torso) or shorter and plumper (stretch running the width of the torso).  Look at the two doll bodies below:


The very same pattern was used for both.  The doll on the left was placed with the stretch grain running side to side, and the one on the right the stretch grain runs the length of the body.  There is almost one inch difference in the height of the dolls!

Simple dresses can be made by cutting a waistband to fit around the doll; cut a skirt to gather to the waband, then sew a button and buttonhole loop to the back.  She doesn't even need straps to hold up this simple dress.

I made some knit and crochet patterns for these tiny dolls, that should fit Ann Wood's Tiny Rag Doll, and slender bodied Hitty dolls as well:


Tiny Crochet for Cloth Dolls


Tiny Knits for Tiny Cloth Dolls

Enjoy the day!

Update 10/14/2019:  Here is another crochet pattern for this tiny cloth doll:

Tiny cloth doll nightgown, shoes, dress, hat

Here is a picture of most of these items


Wednesday, February 13, 2019

Feel Better Friend #4

My fourth Feel Better Friend, for a tiny Club Foot warrior.  Children with club feet (ankles that turn inward, outward, or downward) wear a set of boots and braces for as much as five years after birth, after several casting and manipulations shortly after birth to orient the feet into the proper position.  So the sweet girl receive this doll has several years of braces ahead of her.

I was lucky to find that one of the knit sweaters in the Arne & Carlos book fit this doll almost perfectly, changing to DK weight yarn and size 3 and 4 needles.  All I had to do was shorten the sleeves slightly.

She is on her way to her new home, and I am on my way to making some tiny cloth dolls!


Sunday, January 27, 2019

Feel Better Friends Kent and Hunter


My second and third Feel Better Friends: Kent, who is a tiny Heart Warrior, and Hunter, a courageous little girl with congenital diaphragmatic hernia.  Kent has arrived at his new home, and Hunter will begin her travels Monday.

This doll pattern is simple and sweet, and I'm about ready to work on number four!  Follow the hyperlink to Feel Better Friends website.

Sunday, January 13, 2019

Henry, my first official Feel Better Friend


Henry is my first official Feel Better Friend, for a little boy who is battling brain cancer.  He is indeed a tiny Superhero!  I have a pattern for his Superhero cape, and also a mini-pattern on how to make a doll's head that has no wobble!

Superhero Cape

No Wobbly Heads

No wobbly heads basically uses the jointed head technique I've been using for years, but instead of jointing the head, you ladder stitch it to the neck stub.  For small children this is probably preferable, as they will be less likely to pull the head off!

Tuesday, January 8, 2019

Feel Better Friends

My test doll for the Feel Better Friends Volunteer-in-training

I have joined a group called Feel Better Friends.  Their mission, in their own words: "Feel Better Friends are handmade dolls stuffed with love and well wishes, crafted by volunteers and donated to children battling cancer and other illnesses."  

A perfect fit for someone who enjoys making dolls and seeing them in the hands of children.   To join, you must create a test doll from the Feel Better Friends pattern available on Ravelry and submit it to the Facebook group Feel Better Friends Volunteer-in-training for approval.  Once approved, you become a member of the Feel Better Friends Dollmakers.

For my test doll, I created a new type of wig cap, working in a semicircle in rows instead of a circular cap worked in spiral rounds.  I also created a T-shirt, blue jeans and shoes to fit my doll.  The doll is 12 1/2 inches tall worked in Vanna's Choice worsted yarn and an E hook.  I am happy to share the patterns with you!


Semi-circular wig cap for Feel Better Friends doll


T-shirt, Jeans, shoes for Feel Better Friends doll

I'm about to start on my first doll for a child, a young boy of two battling brain cancer.  It is my believe that  a doll is a tangible expression of love and hope.  May they bring comfort where it is needed most.