It is amazing the places that inspiration can take you! I've fallen down the rabbit hole of wooden dolls, starting with Penny the clothespeg doll. She lead on to carving a Hitty from Judy Brown's well constructed kit and blank.
But I wanted to be able to make a wooden doll, one with joints, without using someone else's blank, and with materials I can easily get my hands on. Something a bit more than a clothespeg, but a lot less than carving from a huge block of wood. I don't have a scroll saw, so the doll would have to be small, and preferably made from materials I can get locally (read that as Michael's).

This image shows all the tools and materials used to make this wee wooden doll.
1. A carving glove (thank you, Jenny!) for the hand holding the work, and a thumb guard for the hand holding the knife to keep you safe.
2. Two knives: a Warren whittling knife recommended by Judy Brown (and that came in her Hitty kit), and an Exacto whittling knife with a straight blade.
3. A leather strop to keep the blades sharp
4. A Pin vise for hand drilling 5/16" holes for the jointing
5. A 1"x0.75"x2" block of basswood. This came in a bag of blocks from Michael's. This is the body.
6. Two clothespegs. The prongs of the pegs will make the arms, the head of the peg will make the legs.
7. A 25mm (about 1") wood bead for the head. Make sure there is a hole in the bottom of the bead. I thought 20mm would work, but the head looked too small.
8: 3/16" dowel to peg the head to the body. The only time I needed a power drill was to drill the hole in the top of the neck for pegging the head.
9. 320 grit sand paper backed with duct tape.
10. Waxed linen cord to joint the arms and legs. You could use 20 gauge wire, or 1/8" dowel rods instead. If using the dowel rods you will probably need to use a power drill to drill the jointing holes. And if you use the dowel, the legs and arms will move together.

I drew a rough sketch of the doll I wanted to make. This drawing shows her to be about four inches tall, and uses a hip jointing technique used for many Hitty dolls. It is easy to carve, and allows the doll to sit very nicely.

To carve the body, copy the body front and side patterns onto card stock and trace the image onto the bassword. Make sure the side profiles face in the same direction on both sides of the basswood.
Drill the holes for the arm jointing now. Drill the holes for the leg jointing after you've cut out the hip area.
Make a stop cut all round the front, sides, and back along your pattern lines. Make a stop cut at the waistline as well. I used a small saw to cut out the hip joint area. Drill the holes for the hip joints.
Whittle out everything that isn't the body, stropping your knife frequently to keep it sharp.
I also sand it every once and a while with 320 grit sandpaper. I back the sandpaper with duct tape and cut it into small strips.

I cut out the pattern for the arms and traced it onto the flat side of the clothespegs, then made a stop cut all around the arm, and one at the wrist. Drill the hole for the arm jointing before carving the arm.
Whittle the arms to shape. If you are daring (I wasn't) try making indentations for fingers.
For the legs, I didn't trace the pattern on the peg. I did make a stop cut at the knee on the front, and drilled the holes for the hip joint, then carved the leg, and also carved a shoe out of the knob at the end of the peg.
Both the arms and the legs turned out a bit plumper than my pattern, but I think they looked better this way.

A look at all the carved pieces against the pattern. If necessary, drill out the hole in the wood bead so the dowel rod will fit, but it should fit snug, both in the bead and in the body.
Glue the bead to the dowel, then glue the dowel into the body. The bead head should 1) rest against the neck, and 2) the grain should be up and down on the bead if you want to carve eye sockets.
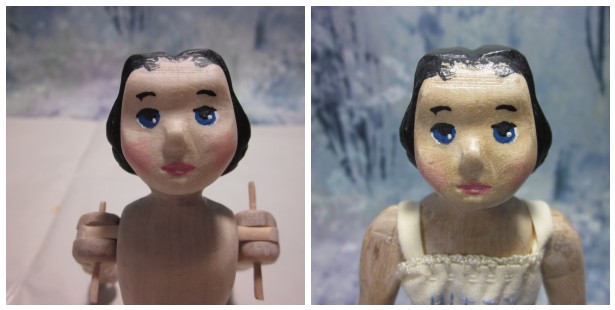
After the glue has dried, carve the bead head if you like. I wanted a profile sort of like a Waldorf doll, so all I did was carve an indentation for the eye sockets, and a very small mouth carving.

After all of the pieces are carved to your satisfaction, seal the wood with a matte varnish. I bought mine at Michael's; I think it was the Folk Art brand. Matte will not give you a glossy finish, which I like. Here the pieces are drying; paper clips run through the jointing holes work very nicely for hanging the pieces to dry.
After the first coat of varnish, I sanded the pieces lightly, then gave them another coat. After this coat is dry, paint the face, and socks and shoes if you like. Let all of this dry at least 24 hours, then add another coat of varnish.
You can add an antiquing medium to your work if you like. I think it gives the doll a warmer look. Again, the antiquing medium I bought was from Michael's. I applied it with a soft cotton cloth (cut up undies), then wiped it off immediately. Enough remains to tint the doll a warmer brown. Let this dry for 24 hours, buff, and now you are ready to joint the doll.
I used a waxed linen cord from my macrame jewelry days (geez, at least 30 years) to joint the doll. Tie an overhand knot three times in one end of the cord, thread through the limb, body, limb, then tie another overhand knot as tight against the opposite limb as you can. There will be a bit of give, so the limbs will move freely, and she won't stand on her own real well. But, she sits very nicely :-)

I made three different wigs for this doll: On the left from a fingering weight mohair/linen yarn with a size 7 steel hook. Middle is Knit Picks Palette with the same hook, and on the right Laceweight mohair with the same hook (it took more stitches to make the cap than the other two).

I decided to go with the close curls of the laceweight mohair, and thus Linden Grace was born. Linden Grace, named for the Linden tree which gave her her body. With the waxed linen jointing she doesn't stand real well, but she does sit very nicely :-)
I have another doll in the works, just to prove to myself that making the first one was not a fluke!