
Holiday blessings to you and all you love. May joy and beauty grace the new year.
Holiday blessings to you and all you love. May joy and beauty grace the new year.
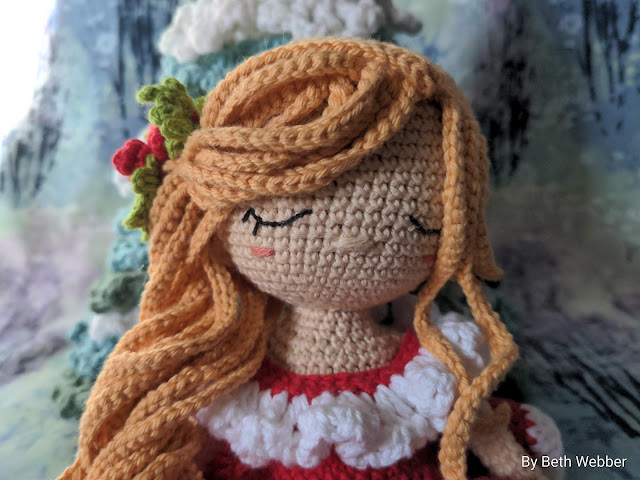
This beautiful doll is from the patterns of Huonghkvn2005, available on Etsy. This doll was made from her Sleeping Rosie pattern.
Instead of using wire to stabilize her head, I wanted her to be more child friendly, so the head is stabilized using a modified neck stub, then crocheting the head around the stub. It is similar to a technique I've used in the past to make a move-able head, but this is simpler and sturdierl
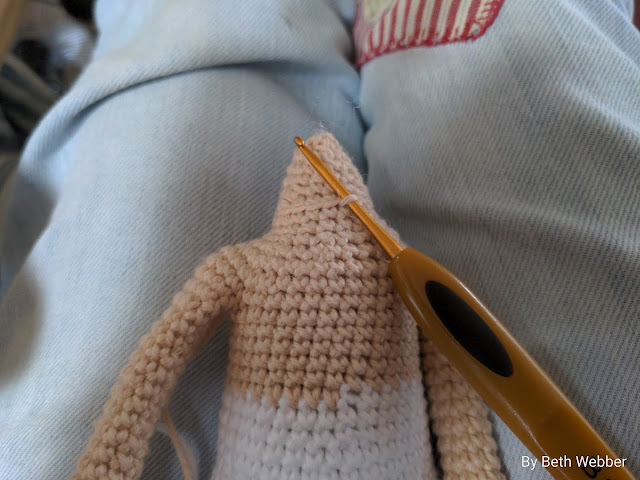
This technique will work for any doll that is worked continuously from the feet to the head. When you get to the final round at the neck, continue working in a decreasing cone, with the first round of this cone worked in the back loops, leaving front loops free to work the first round of the head. I decreased this cone over five rounds. Finish off.
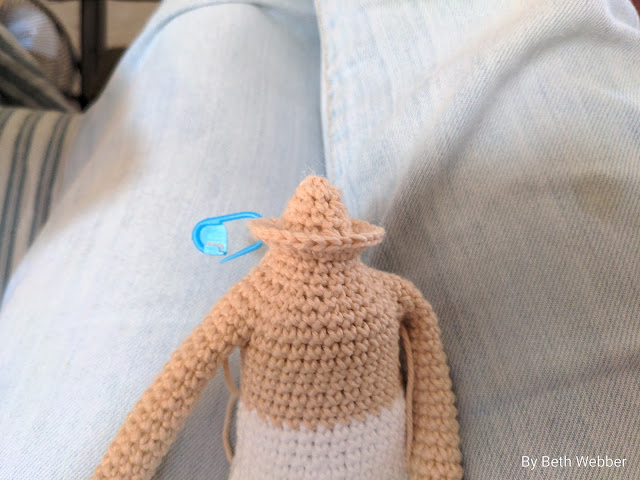
Attach the yarn to the first unworked stitch at the neck, working the first round of the head as written, into the free loops left at the end of the neck row.
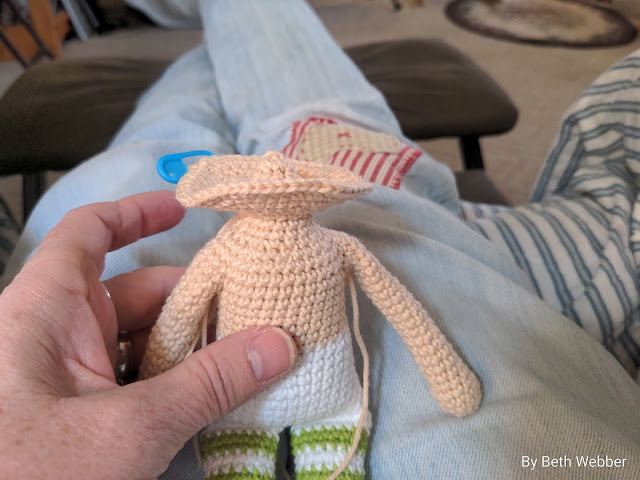
Continue to work the head as written. You will now have a very stable neck and can stuff the doll head very firmly. Even a head full of heavy hair will not be a problem.
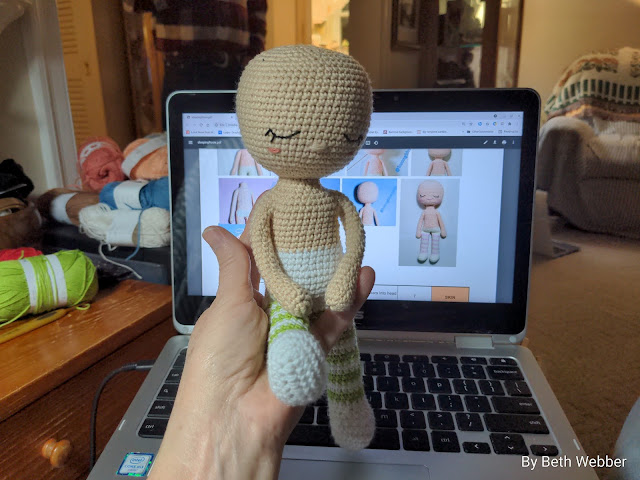
Head stuffed firmly, and no wobbles!
And a beautiful head of hair.
Enjoy the crochet!

These dolls are from the patterns Sunny Farm and Mini Kingdom by Olka Novytska. I wanted them to have a barn, and eventually Sunnie will have a tiny home. As a footnote, when my Grandfather bought his farm in 1938, he didn't care what shape the house was in...just how well built was the barn!

All you need to make this tiny barn is a small box, an empty cerial box, and a piece of sturdy cardboard for the roof and the back of the barn. Tacky glue, a ruler, and a craft knife. I painted my barn first with Gesso, which is a medium that strengthens the cardboard and also provides a nice surface for paint. Red paint for the barn, brown for the barn flooor, and brown and green for the entry to the barn. I used a craft knife to cut the cardboard. Be careful you don't slice off your finger!
With one of the flap sides of the box, turn up one end to form the roofline of the barn, and slice the side flaps in two to make Dutch doors. The remaining flap is the barn entry. Lay the front of the barn on the sturdy cardboard and trace around the side and roof (you want the door flaps closed when you do this). Cut this piece out with craft knife and glue this piece to the back of the box (see the middle picture at the top).
Cut out two supports from the cerial box to glue between the front and back of the barn roof. This will not only stabilize the barn, but you will glue the roof to these supports. You can see this in the middle and right side pictures at the top. Let all of this dry.
Cut the roof from sturdy cardboard. I was fortunate enough to have a piece of sturdy white cardboard to use for the roof. Measure the total length and width you will need and cut a square, then find the midpoint and measure for the flat portion of the roof. Score these lines with your craft knife to give you the Mansard roof look that this barn has. If you have a front overhang of the roof, cut it back at an angle so your top Dutch door with swing freeely.
Paint the entire barn with Gesso and let it dry, then paint the barn whatever colors you like. After all the paint was dry, I decorated the sides with buttons.
What took the longest was waiting for glue and paint to dry between steps!


By Moonlight and Starlight, may you walk in peace.

World of Dolls Pattern Bundle D by OchePots on Etsy
I hope noboday faints when they see this post abouts dolls! With Christmas on our doorstep, I want to share with you several dollmakers and their patterns. All are made with simple stitches...the details make the difference. And all the dolls could be Art Dolls, or your child's favorite Holiday gift.
Let's start with the dollmaker that I am currently in love with: OchePots on Etsy Her dolls, like the World of Dolls above, are unique in construction with very little sewing. The above peg dolls are free standing!
The doll below, Amity, is dressable and you can purchase an extensive wardrobe for her:

Amity, another delightful doll pattern by OchePots on Etsy
If you like mini, then Olka Novytska of Aradiyatoys, is a great choice. Her patterns are available on both her Etsy shop, Aradiyatoys and on Ravelry. Below are a couple of her designs I've complete:

Shepardess and her sheep, from the book Mini Kingdom, by Olka Novytska

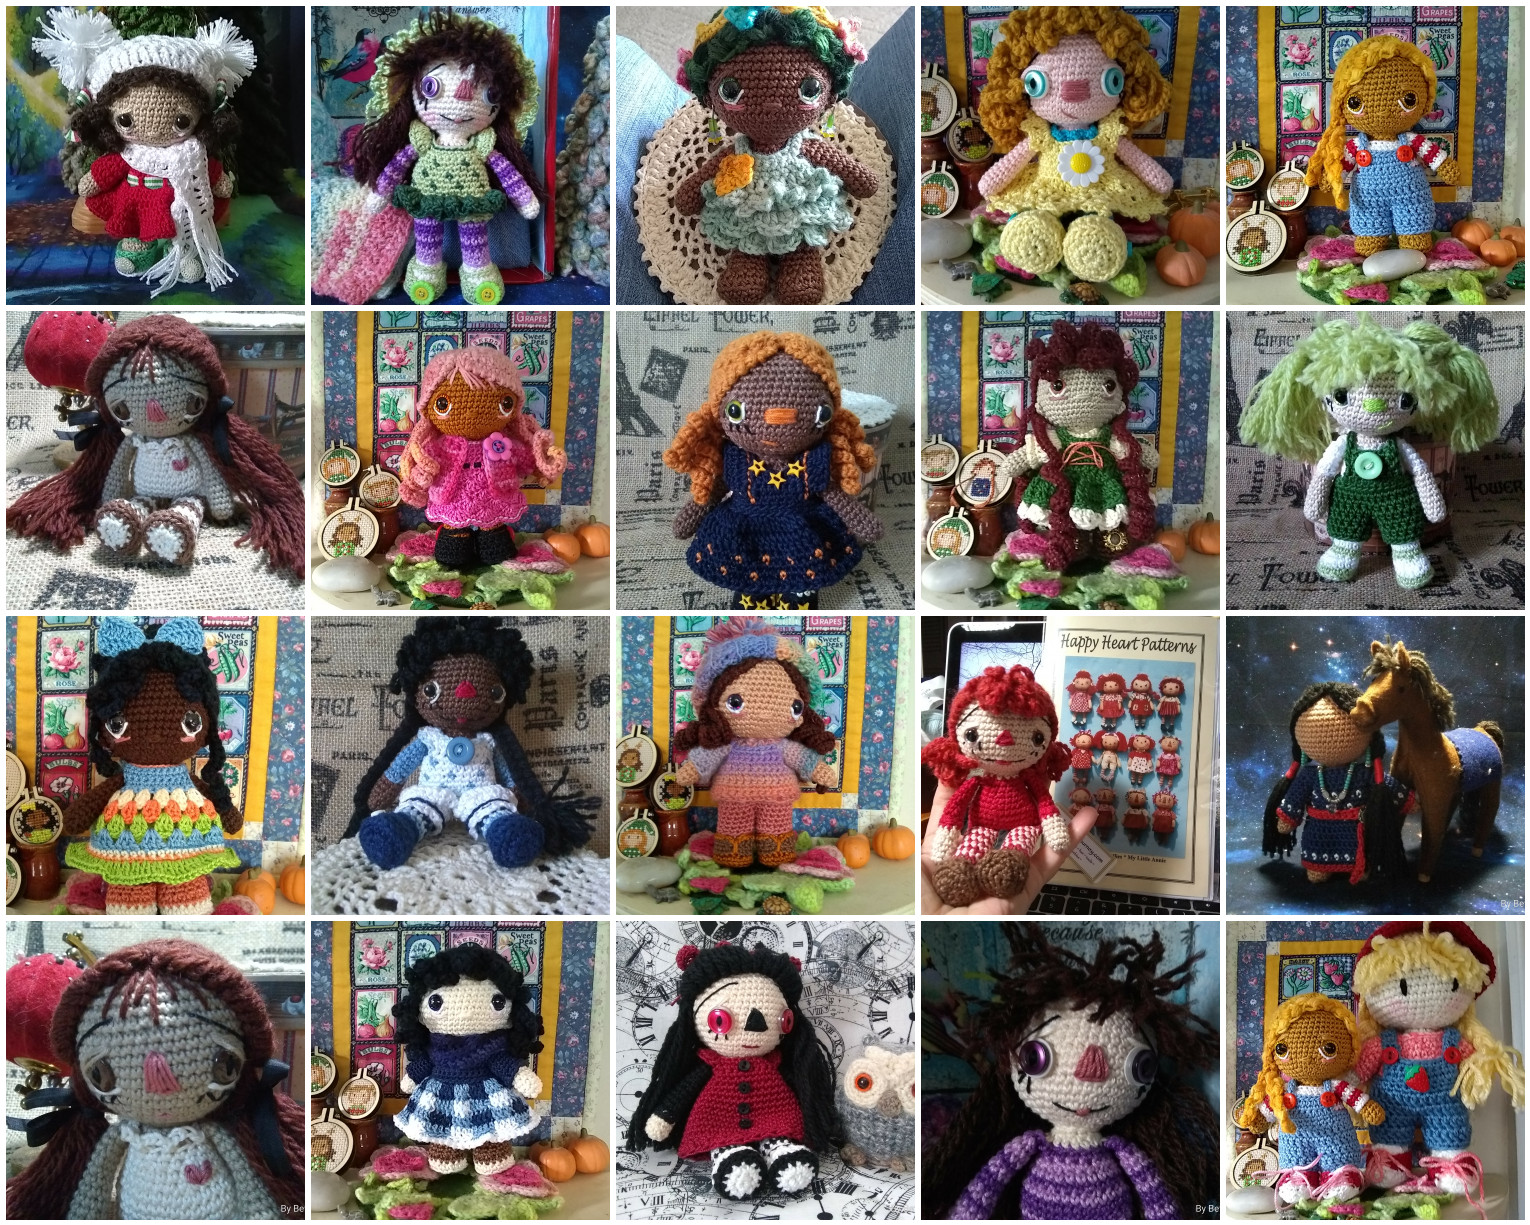
Sandy Nordwall Eggers' patterns are the ones I have made the most dolls from. Her patterns are available on Ravelry, are very well written, and are a great value. Making her dolls helped to keep me sane during the worst part of the pandemic. This is just a sample of all the dolls made from her patterns:

The many, many faces of Sandy Nordwall Eggers' doll designs.
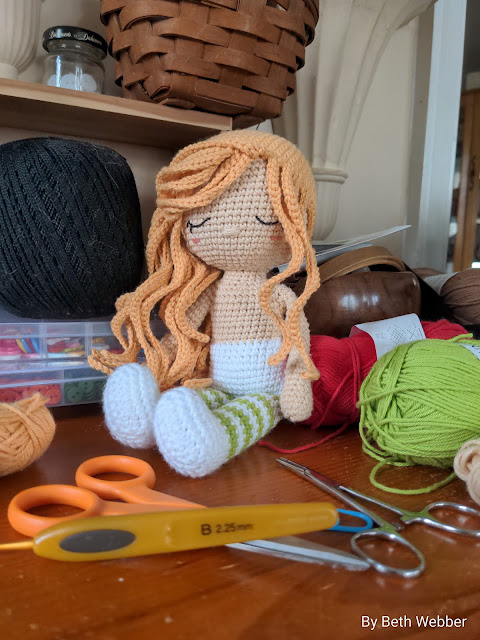
Cute and quick dolls can be found with the designer of Sleepy Sheep Patterns, available on Etsy. If you want a slender doll that isn't wired, these patterns are for you:

Dolls made and adapted from Harmony the Elf, by SleepySheepPatterns.
For the more fantasy minded, Fantasy Sprites on both Etsy and Ravelry has some of the most amazing creations. These dolls are for the most part wired, but it was the easiest wire armature I've ever done. They are worked in cotton; I used size three Curio from KnitPicks:

Fantasy Sprites, by Lianne Peterson on Etsy.
Two more designers of beautiful dolls are Carla Vigliucci on Ravelry, and Lulu Compotine, on Etsy.

Carla Vigliucci's dolls all come with such sweet wardrobes.

The last designer I will mention is Jessica Doerring, of Neogurumi on Ravelry. Her patterns were some of the first that I made that were crocheted all as one piece, with the arms crocheted into the body. I hate sewing pieces together! So, it was love at first site with her Eva doll. Many of Jessica's patterns are free, and the others are all a great value. Another pattern that I have made many dolls from:

Many Eva's!
So now is the time to grab your hook, some yarn (wool, cotton, acylic...they all work for dolls), and make something special.
Enjoy the crochet!

Faith can take you unaware
As you stare into the darkness
Of despair within your heart.
Faith can take you unaware.
And Hope, her child, follows close
To heal the broken and the lost
Upon the shores of life and death.
What is the cost of Hope?
Love is the cost of Faith and Hope;
The beacon that chases away the dark;
The sinews that bind the broken heart;
The foundation stone of Faith and Hope.


All you need for this project is a Raman Noodle box, some colored Duck Tape (or for the purist among us, Duct Tape), box cutters, fabric, fusible interfacing, and glue. If you want join several boxes to make a simple doll house like above, some large pieces of cardboard will be necessary.

First thing to do is even up the edges of your box with the box cutters, then with the duck tape, tape around each edge. I do this for strength as well as aesthetics - I don't like the raw edge of the box to show.

Next, measure the box for your wallpaper, which is the fabric you chose with fusible interfacing backing it. I only 'papered' the back and side walls, and left the ceiling and floor with the cardboard exposed. Cut your fabric slightly larger than your measurements; you can always trim it to fit.

My chosen fabric (making a library here) and the interfacing. Apply the interfacing to the BACK side of the fabric per the interfacing instructions. Always use a damp cloth when applying interfacing so you don't scorch the fabric.


Next thing to do is to fit your wallpaper to the sides and back of the box. With the edges covered by duck tape, you don't have to make the fabric perfectly flush with the edges. In fact, I let about 1/2 inch of tape show. I hold it in place with clothespins, and measure what needs to be trimmed off.

After you have cut the wallpaper to fit the inside of the box, glue it in place. I do this by using clothespins to hold one side of the fabric to the edge of the box, fit the fabric into the box and crease the corners with the end of a paintbrush. Then, pull back the side of the fabric that is not secured to the box with clothepins and smear glue over the back and sides. I use an old paintbrush after I've applied to glue to spread it thinly but evenly over the surface. Carefully press the fabric into the glue, creasing the corner and making sure you get right to the edge of the fabric on the side wall. Use clothespins to secure the glued section to the side wall, turn the box around and repeat on the opposite side

One side pinned with clothespins, all glued in and ready to pin the other side.

I made three boxes, a library...

a bedroom,...

and a parlor (more like a window seat), then glued them together to make a simple dollhouse. To do this, I placed the library and parlor together and duck taped them on the bottom, back, and top where they joined. I then cut a pieces of cardboard to fit the joined bottom and top and glued this in place.
I added the bedroom to the top of this assembly, glued it to the top and taped it along the back joining.
Once this glue was dry, I cut a larger piece of cardboard to cover the entire back side of the dollhouse and glued it in place.

Back side of the dollhouse

Front side of the dollhouse!
The bedroom has a small closet with four hangers, made from clothespins taken apart and cup hooks

Once the dollhouse or roombox is finished, then you get to decorate! I used two inch foam for the window seat, and just covered it with denim from an old pair of jeans. The rug in the library is crocheted from size 10 cotton; the bed crocheted from sportweight yarn, and the chair in the library from a tutorial on this blog somewhere (this might link you to the tutorial) Any bits of fabric, foam and stuffing can make some easy furniture.
Enjoy your new home!
What have YOU been doing since the start of the year? I've been obsessed creating dolls from Sandy Nordwall Eggers' Puddin pattern. The doll pattern is freely available on Ravelry, and the clothing for this doll is either free or very inexpensive.
The doll is easy to crochet. And also easy to make minor modifications to. As you can see, some of these dolls have longer arms and legs...just add rows. I made several to look like Raggedy Ann and some of her friends...use buttons for eyes (the best size I found was a 3/8 inche button for the iris and a 1/2 inch button for the whites. Use black crochet cotton to sew to the head and you have the pupil!)
Most of the clothing on these dolls is either Sandy's exact pattern, or modified slightly.
I used size 3 crochet cotton, which is available as Aunt Lydia's Fashion 3 or Knit Picks Curio 3. 100 grams are 280 to 300 yards, so it is like a light dk weight yarn. With this thread I used a 2.25mm hook (B), and used the same yarn for most of the outfits. My dolls turned out between 5 1/2 and 6 inches tall. Knit Picks has a wonderful selection of colors, and Aunt Lydia a great selection of skin tones: Chocolate, Copper, Natural and Bridal White. You can sometimes find size 3 crochet cotton at Thread Art...they have a very pale pink that works well for skin tone.
Enjoy looking through Sandy's wonderful collection of dolls, doll clothing, and other delights!

Enjoy the day, and enjoy the crochet!
