Thursday, August 18, 2011

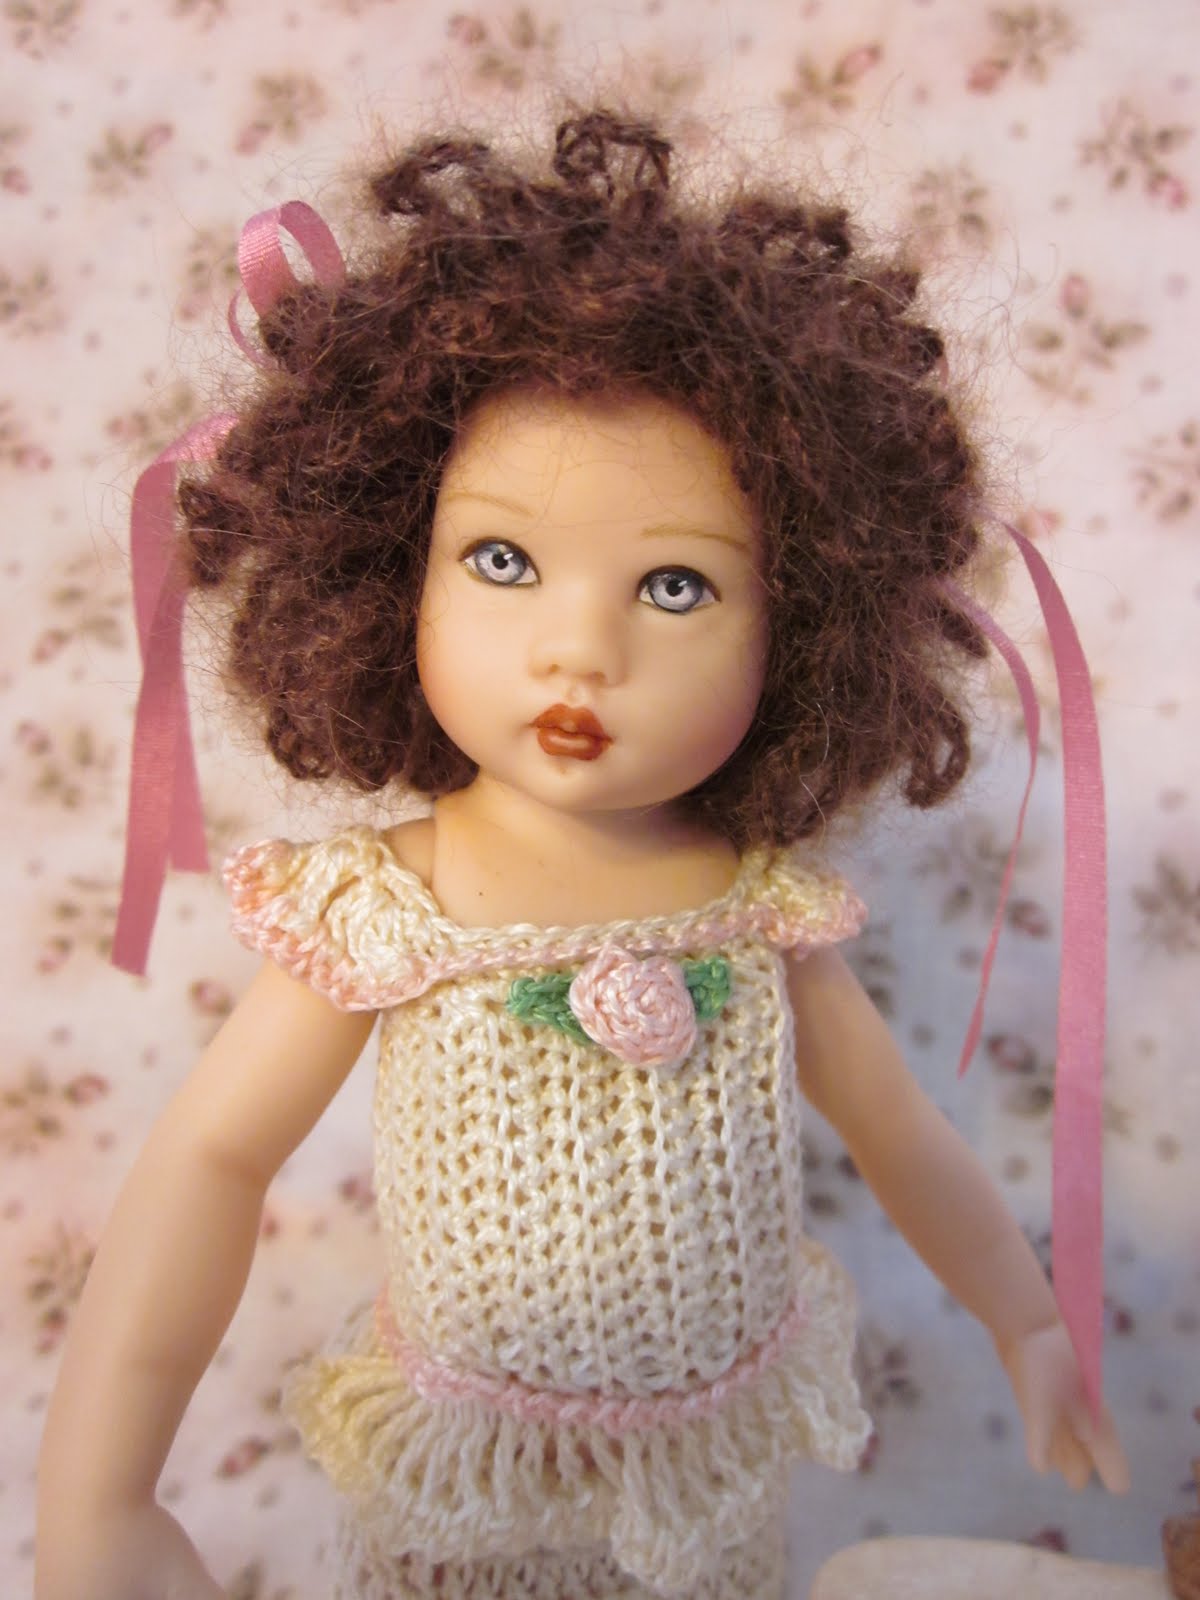
My latest obsession: crochet for Kish!

These little dolls, Helen Kish's Riley (known to me as Kate), and Tulah (I call her Nell) are delightful to crochet for.   Small, but not so small that you'll go blind trying to see your crochet stitches; nicely shaped, and made of vinyl, so you don't have to worry about breaking off a finger.  Kate and Nell now have some dainty crochet underthings, always a great place to start.


These sweet little dainties are crocheted with size 8 perle cotton and a size 7 steel hook.  There are three variations of pantaloons, and three variations of camisole.  Each of the camisole bodices could be the basis of a dress, sundress, rompers, t-shirt, you get the idea :-)

I have a feeling these girls are going to get a new sister, and a much bigger wardrobe!

Enjoy the crochet.

Tuesday, August 16, 2011

Wigmaking for Tulah

 Tulah modeling her many wigs

I love dolls; all kinds of dolls.  My favorites are those of cloth and crochet, but there are some 'store bought' dolls that I cannot resist.  Small BJD's, and the lovely dolls of Helen Kish, fall into this irresistible category.

So when a dear friend of mine (hi Tomi!)  became seriously smitten by Helen Kish's small Riley, it reignited my interest in my own little Riley and Tulah, her friend.  But how to add a personal touch to a doll made by other hands in a far country?

How about a hand made crochet wig?  So, here is a wig making pattern for making your own wig for a very small doll.  Riley and Tulah have a head circumference of 4 1/4 inches.  The wigs are made of laceweight Mohair yarn, which works up to a gauge similar to size 10 crochet cotton.  This wig pattern can be adapted to other small dolls, particularly small Lati's  (White and Yellow)  and Fairyland dolls (Puki Puki and Puki Fee).

And, I think  Riley and Tulah are in for some crochet finery.  You know the drill, camisoles, pantaloons, dresses, sunsuits.  Should be fun!

Tulah says, 'enjoy the crochet!'


Saturday, August 13, 2011

Angel Cake, a Strawberry Shortcake friend

Sometimes it is fun to make someone else's pattern :-)   I have to thank Susan (aka BlueEyedGirl) for inspiring me to make this pattern, which I've had for several years.  I loved the way the dolls looked, but there were a lot of things I didn't like about the construction of the doll.  Susan reminded me that, if you don't like it, change it!

So, on her advice, I used an 'E' hook instead of 'G'  for the doll body, and used acrylic eyes instead of making them from felt (except for the whites).  This made my doll 10 inches tall, instead of 14.


Other changes I made to this pattern were to give the doll a wig cap, instead of attaching the hair to the hat, and also jointing the neck and arms.  To joint the neck, you need to work the pattern 'backward.'  That is, start the head at the neck edge (instead of the top of the head), and work the body starting at the neck (instead of the feet).   Her head is a bit too floppy, so instead of working three rounds of 10sc for the neck, next time I will only work two.

I also hinged the legs the way the Pocket Spirits are done, so this means the entire body from neck to feet is worked backward.

Her clothing is removable, but believe it or not, by using two hook sizes smaller for each part of the doll, the clothing patterns fit beautifully.  Instead of working the t-shirt in rounds, work them in rows and add buttons and button loops to the back.

I like her so well, I will probably make her a friend, if not all of them!  Thank you, Susan, for the great suggestions and your wonderful doll (See her here).

Enjoy the crochet!

Tuesday, August 9, 2011

Teacup Cottage

I love dollhouses; bet you'd never guess :-)

This little dollhouse for the Teacup Spirits is made from a Michael's CD cubbie.  I had this collecting dust in my sewing room for a couple of years, just waiting for the right inspiration to do something with it.  After making a few Teacup Spirits, I realized it was the perfect abode for them, and their friends :-)

I painted the house with a coat of Gesso, to give a nice surface to paint on.  Then used primary colors for the outside, and white for the inside.  For wallpaper, I used scrapbook papers.  The only problem here was deciding what papers to use, and not end up buying everything in sight!


I papered the back wall only (make it easy on yourself), by cutting a pattern for the wall, then cutting out the paper to the pattern.  I glued the paper to the back wall by watering down glue to the consistency of cream, then painting it on the entire wall.

The windows (both inside and out) are trimmed with narrow ric-rac around the curved edge, and some woven braid along the bottom.

Soft rugs are felt.  I planned to embroider a design on each rug, but got impatient.  The design is penciled on the bottom side of the rug, if I change my mind :-)


Full of dolls and furniture!  The furniture is made from one of my all time favorite things to play with...wood findings from the craft and hobby store.  The bed is made from four tiny clothespin pegs (courtesy of Joyce!) and craft sticks.  The clothespin pegs make the four posters, and the craft sticks the side rails, head and footboard, and stringers.

The parlour furniture is SO simple!  Two 1 1/4 inch wood blocks are the base of the chair; the back is made of craft sticks cut to size.  The chairs are painted and embellished with lace and felt cushions.

The table is a wood disk glued to a wood flowerpot; painted and trimmed with ric-rac.


You can see how simple the chairs are, and the bed was not at all hard to make either.  The mattress is a length of Warm&Natural batting folded three or four times to make it nice and soft.  A crochet comforter is in order, I think.


It isn't too early to be thinking about Christmas, and this little dollhouse would make a delightful Christmas gift for a lucky girl.  You could make a Christmas cottage, a Gingerbread cottage, a seaside cottage, a Tudor cottage.  The possibilities are limitless; let your imagination fly :-)

Monday, July 25, 2011

Guest Crochet Dollmaker - Joyce Yearsley

It is my pleasure to introduce you to Joyce Yearsley, also known as Dutzie on Flickr.  She is a wonderful crochet dollmaker, and Melanie, above, is the latest example of her lovely work and crochet innovation.   

Melanie has the most delightfully curly hair, made from crochet roses attached to a wig cap!  Simple as that, and yet so cute.  Joyce has shared a tutorial for making this wig cap on her Flicker site, and has also graciously allowed me to share it with you on my blog.  Click the link curly wig cap or find it on the left hand sidbar under Tutorials by Joyce.

This delightful doll also has another cool innovation...ball jointed arms and legs!  This is a technique you can apply to almost any crochet doll you are making; Joyce shows you how in her tutorial Ball Jointed Arms and Legs also shared here.

I am truly fortunate to know such a gifted and generous dollmaker.  Thank you, Joyce, for sharing your talents with us!

My latest Teacupsie Spirit used Joyce's curly wig cap tutorial to make her cute wig.  Crocheted from size 10 crochet cotton, I just made the unrolled roses a little longer for sausage curls.  What a great idea :-)

Enjoy the crochet!

Thursday, July 21, 2011

Welcome home, Atlantis. Farewell, Shuttle

All the photos on this page are from the NASA website:  www.nasa.gov


Shuttle Atlantis touched down this morning at 5:58 EDT, bringing to an end the Space Shuttle program, after 30 years of flight.

I watched entranced, 42 years ago yesterday, when Neil Armstrong and Buzz Aldrin landed on the moon.

As a child in grade school in the 60's, every Gemini and Apollo launch was watched on a TV wheeled into the room just for that purpose.  I was captivated by the space program, as so many of my generation were.  The space program was a ray of hope during the bitter decade of the 60's, and inspired me to study science and math, and go on to become an engineer.  


I recall holding my breath as Columbia landed for the first time, in 1981.   I watched dumbstruck as Challenger broke apart in 1986.

And I have been wholly amazed at the construction of the International Space Station.  Not only a marvel of engineering; not only like building a ship in the middle of the ocean from the keel up, but of the international cooperation between countries that only a few years ago were bitter enemies.


Interestingly, we cooperate better in space with former enemies and rivals, than we do within our own congress.

In space we speak a common language of committment, focus, dedication, and passion .  Surely this is a legacy that must be passed on to our children.  If we do nothing else as a country, we should inspire our children to dream beyond their horizons, to be passionate and focused and dedicated.  The space program brings out the very best in us, and shows us just what amazing things we can accomplish, when we work together.


Welcome home Atlantis!  Godspeed, NASA, on your next manned mission of discovery.  I hope the wait will not be too long.

Friday, July 15, 2011

Variations on a Teacup Theme

I'm a sucker for cute, tiny dolls; and these little sweeties are a wonderful inspiration for a variation on the Teacup theme :-)  By altering the basic Teacup Spirit pattern a very happy little crochet Teacupsie Spirit can be created.

You can find the pattern for the alterations here and on the left sidebar under Teacup Spirit Patterns.  She can even wear the Teacup Trousseau :-)

Enjoy the crochet!

Thursday, July 7, 2011

Tiny Teacup Trousseau


Now you can cloth your Teacup Spirit in a variety of outfits, from one basic pattern :-)  All of these dainty little costumes start with a bodice worked from side to side, my favorite way of making crochet doll clothes.  If you work in the back loops only, you get a neat ribbed effect, like the pretty pink camisole in the bottom right.  Or you can work in both loops for a vertical line.   You can also alternate colors for vertical stripe, as in top left.  Cap sleeves, lace sleeves, puff sleeves, or no sleeves.  It is a great starting point for your imagination!

The pattern is here, and also on the left sidebar under Teacup Spirit Patterns.

Enjoy the crochet!

Wednesday, June 29, 2011

Teacup Spirits

Here is a new pattern for an even smaller Spirit doll.  Teacup Spirits!  They are just under five inches tall, and inspired by my little Lati White Belle.    They have movable heads and shoulders, and pose-able limbs.  Once I got the pattern the way I liked it (took four tries!), it only takes about an hour and a half to crochet the little doll.


Tiny wigs from laceweight mohair, fingering weight yarn, or embroidery floss cap these little darlings off very nicely.

This wig was made from laceweight mohair/silk yarn.  A little goes a long way!  It is 7/8 oz and 195 yards.  I used a size 1 steel hook, and made chain loops for the curls.


This wig was made from fingering weight wool yarn.  It is 1 3/4 oz, 310 yards.  I used a size 1 steel hook, and this wig is removable.  If you make the cap a little smaller, I bet it would fit a Lati White or PukiPuki BJD :-)


This wig is made from embroidery floss, which is fantastic at this scale.  All those colors!  It takes three or four skeins of floss to make a wig; for this long wig it took three skeins.  To make crocheting the wig cap easier, I wrap the floss around a floss bobbin before crocheting.  If you need another skein to finish the cap (I did) just wrap it around your empty bobbin and tie it on to your working strand.  Make sure the knots are on the inside of the cap.


This cute, curly cap is made from worsted weight boucle yarn.  A bit big for this scale, and the stitches are not so easy to see, but still doable with a size C crochet hook.  And any mistakes are invisible in all these curls :-)


Click the link for the Teacup Spirit Pattern  or you can also find it on the left sidebar of this blog.


Think small!  Clothing patterns to follow :-)