Wednesday, December 28, 2011

Portrait Dolls by Victoria DiPietro

 Katheryn Josephine in her many wigs

I have an exciting project in the works!  I've been asked by doll artist Victoria Di Pietro  to collaborate with her on a doll design CD to be offered this coming Spring.  Victoria designs and creates some of the loveliest dolls in cloth and paper clay that I have ever seen.  And her costuming skills are equally impressive. 

Katheryn Josephine, above, is a working model of the Portrait Doll that Victoria envisions.  My contributions to the endeavor are the crocheted wig designs that Katy Jo is modeling, and some easy crochet garments yet to be created.

Anita Marie, with a wig of Tibetan lamb

This is Anita Marie, sister to Katy Jo, also created by Victoria.  Victoria also crafted her wonderful wig, from Tibetan lamb.  All of the wigs are removable, thanks to a crochet cap as the base.  Simple double sided tape secures the wig to the head.

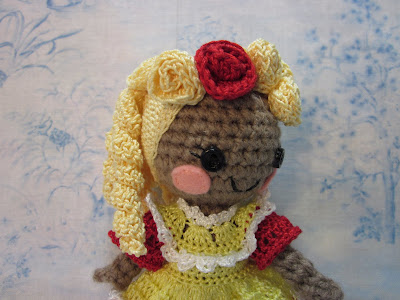
You can see, in both of these wonderful dolls, Victoria's amazing costuming skills.   Clothing patterns by Victoria, and crochet patterns by moi.

 Anita Marie and Katheryn Josephine, beautifully crafted by Victoria DiPietro

This doll is created in craft velour, with the head sculpted in paper clay.   This is a beautiful doll from within and without.  A Portrait Doll, to create in the image that you envision.

I hope this has piqued you interest in this unique doll.  Stay tuned for further developments :-)

Monday, December 12, 2011

Three new girls

In between wrapping Christmas gifts I've been working on three new knit girls :-)   My knitting gauge is still not quite as it should be; the first two girls turned out a bit smaller than I intended.  Violet and Jennifer ended up  eight and a half inches tall.  But I love small dolls, so they will fit right in.  Their big sister Virginia is a few rows larger, which made her nine and a half inches tall. 

They all have lots of lovely mohair hair, and they were so fun to make. 

Now to get them dressed!

Saturday, December 10, 2011

A simple knit sweater for Riley

Here is a very simple knit sweater to fit Riley, Tulah or Zsu Zse.  It is just rectangles, with no shaping.  The shoulder seams are sewn, then the sleeve stitches are picked up and knitted into the side of the sweater.  Sew up the sleeve and side seams, and it is done!  All you need to know are the knit and purl stitches.

This is a resizing of the knit sweater I designed for my knit Waldorf doll.

The pattern is here and on the left sidebar under Krochet for Kish.

Enjoy!

Sunday, December 4, 2011

Thanksgiving Blessings, 2011

Many are our blessings.  These are mine.

Remember your blessings this Holy Day season.

Friday, November 25, 2011

Creative Black Friday

Welcome Creative Black Friday!  To celebrate a new tradition, here is a simple knit doll, about nine to ten inches tall, and her simple knit wardrobe.   With some very easy needle sculpting, she looks very much like a small Waldorf doll.  Here are the patterns:

Knit doll pattern

Knit Undies

Simple Knit Dress

Simple Knit Sweater

Simple Knit Pullover Sweater

Simple Knit Pants

There is also a picture tutorial to help you make the doll,  here at Knit Doll Tutorial.   All of these patterns and the tutorial can also be found on the left sidebar of the blog, under Knit Waldorf Style Doll Patterns.

These are the first knitting instructions I've put together, so if you have problems with understanding them, let me know and we'll figure out what it is I'm trying to convey :-)

What a pleasant way to spend the Friday after Thanksgiving; a gentle alternative to waiting in line for the latest toy or gizmo, that most likely will be forgotten in the crush of so many gifts.  I can't help but think that a single gift, made with love and given with joy, trumps store bought any day :-)  And think of the pleasure you will have in the making and creating.


 I hope you all had a blessed Thanksgiving, and enjoy the coming Holy Day season.  You should enjoy every gift you give :-)

Tuesday, November 15, 2011

Finishing the Christmas list

I had to take a break from the knitting and dollmaking to finish up a couple of items left on my Christmas list.  I don't know about you, but it has been a couple of decades since I shopped on 'Black' Friday, the Friday after Thanksgiving.

The plum colored cowl is from the Jan/Feb 2011 issue of Crochet Today, made up in Stitch Nation Bamboo Ewe.  It was lovely yarn to work with, and has a wonderful drape.  You can wear it with the buttons in front, or in back.  Looks great either way.

The bolero is a pattern I've had for ages, published in 2001 by the American School of Needlework.  It is worked in Lionbrand Homespun, which is NOT my favorite yarn to work with.  However, it made up beautifully.   This is the second time I've made this bolero; an easy pattern with a neat 'cable' look border accomplished with front post double crochet stitches.

Maybe we should start a new trend, called 'White' Friday, and spend the day making something as a gift for friend or family for Christmas :-)

Have a heartfelt and blessed Thanksgiving, my friends!

Charlie, helping to oversee the photo shoot :-)

Thursday, November 3, 2011

Kaitlyn, a Christmas commission

Kaitlyn is a sweet little cat-eared Pocket Spirit, commissioned as a Christmas gift.  She was a lot of fun to make :-) 

Patterns for the doll, and her outfits, are available free here on the blog.  Look on the left sidebar for 'Links to Pocket Spirit Patterns.' 

I'm starting to run out of time!  Still have several Christmas gifts of my own to make, but I can't stop knitting :-)  I'm enjoying the heck out of learning something new.

Kaitlyn in her birthday suit :-)

Saturday, October 22, 2011

The knitting lesson

Jane Ann, from a free knit pattern from Jean Greenhowe

When I was a kid, I asked an Aunt of mine to teach me to knit.  She tried, but gave up in exasperation, telling me it was 'just too hard for you to learn.'

Well, those words stayed with me for 45 years, until a good friend of mine, Tomi Jane, became interested (this is putting it mildly)  in Helen Kish's dolls, including the delightful knits that you talented knitters create for these sweet dolls.   I too have been in awe of tiny, perfectly knit sweaters, and yet felt this skill way beyond me.

Until now.  Tomi and I decided we would learn to knit.  This was suppose to be a New Years resolution, but I got the itch (to knit), and picked up 'Teach Yourself Visually: Knitting' from the library.   Cast on, knit, purl, increase and decrease.  All I needed to know to have a go at one of Jean Greenhowe's free doll patterns; another craving of mine.  I have loved her knit dolls for ages.  Now I have made one of my very own!

I am ecstatic with my little doll, well beyond just the making of a sweet doll.  Jane Ann is a symbol of empowerment.  We can do, we can learn, and we can create at any age.

Friday, October 14, 2011

Christmas Bazaar 2011 and a new Group!

The dolls I donated to this years High Street United Methodist Christmas bazaar, to be held tomorrow.   I hope they all find good homes :-)

I also want to share with you a new Flickr group that three of us, who love crochet dolls, have created.  It is Hooked On Dolls! and we would love to have you come and visit :-)  It is a group created especially for crochet and knit dolls, and we already have over 200 great photos.  

As always, enjoy the crochet!

Saturday, October 8, 2011

Urban Trails

This week has been the most perfect of weeks.  Clear blue skies over brilliant autumn colors.  Larry and I took a 22 mile bike ride today and never left the city.  There were places along the way where it was easy to forget we were in the 14th largest city in the US.

These are days to savor and enjoy.  Life is good.

Friday, September 23, 2011

Another great Lionbrand cowl

There she is again!   Here is another great cowl pattern from Lionbrand.  This is the Supernova Cowl, crocheted from Vanna's Choice Glamour.  Glamour is a light sportweight yarn with a fine strand of metallic wrapped around the core yarn. 

This cowl made up beautifully; I wish you could see the subtle sparkle the metallic gives this look.   The cowl is 60 inches long, with the short ends crocheted or sewn together.  This yields a lot of versatility.  You can wear it long like a shawl, wrapped once or twice around your neck, or pulled up to cover your hair.   The v-stitch gives a lot of drape.  Simple and lovely to make, this will be a great Christmas gift :-)

Sunday, September 18, 2011

BellaDonna Pocket Spirit

BellaDonna, a Pocket Spirit, is a commission for a friend.  It has been a bit since I've made a Pocket Spirit doll; coming back to them is like returning to an old friend.  I really love to make these little dolls :-)

She is Nightshade's sister; you can see Nightshade here.

Enjoy the crochet!

Friday, September 16, 2011

Quick for Christmas

I've been playing dolls so much, I'm way behind on my Christmas crocheting.  Thank goodness Lionbrand has 3000 free crochet and knit patterns!  This is their 'Fast and Easy Cowl,' and it is just that, and beautiful as well.  It is crocheted of Lionbrand Amazing, a light worsted weight yarn that is 53% wool, 47% acrylic. 

It was heavenly to crochet with, light and soft, and self stripes beautifully.  The cowl took 2 skeins, so it is also fairly easy on the budget. 

The reason there are four of me (one is more than enough!) is to demonstrate the different ways this can be worn.  A lovely, versatile, warm bit of wearable art :-)

Enjoy the crochet!

Thursday, September 15, 2011

EEEK! A Bedbug!

Look who arrived in the mail yesterday...Bliss the Bedbug!!  From the talented April Ross; thank you so much :-)  You can follow the Bedbug antics at Martha and Jane; you will be amazed at what they get up to! 

Bliss scrambled out of that envelope and made herself right at home in my jar of wooden flowers.

I just hope she doesn't bite....

Wednesday, August 31, 2011

Sundress and Rompers for Kate and Nell


From the basic camisole bodice, I made a pair of rompers for Kate (aka Riley) and a sundress for Nell (aka Tulah).   Simple trim for these outfits is a (slip stitch, chain 1) in unworked loops at the waist and across the top of the bodice.  Nell's dress has three rows of these worked at the bottom of the skirt.


You can embroider on single crochet fairly easily.  I made a single spider web rose on Kate's rompers, and surrounded it with lazy daisy leaves and some  French knots.


The socks are crocheted from size 12 perle, which is pretty fine (for me, anyway) to crochet with; but the pattern is a simple one, and I used light colored thread, which helps a bunch!

The sundress/rompers pattern is here:  Sundress/Rompers and the socks are here:  Socks for Riley


One last picture I would like to share with you is from Ann, who made a set of underwear for her dear doll from the Riley camisole and pantaloons pattern.

 delightful crochet from Ann

Ann modified the bodice a bit to get a better fit.  She did a lovely job :-)

I hope you all enjoy the crochet!

Thursday, August 18, 2011

My latest obsession: crochet for Kish!

These little dolls, Helen Kish's Riley (known to me as Kate), and Tulah (I call her Nell) are delightful to crochet for.   Small, but not so small that you'll go blind trying to see your crochet stitches; nicely shaped, and made of vinyl, so you don't have to worry about breaking off a finger.  Kate and Nell now have some dainty crochet underthings, always a great place to start.


These sweet little dainties are crocheted with size 8 perle cotton and a size 7 steel hook.  There are three variations of pantaloons, and three variations of camisole.  Each of the camisole bodices could be the basis of a dress, sundress, rompers, t-shirt, you get the idea :-)

I have a feeling these girls are going to get a new sister, and a much bigger wardrobe!

Enjoy the crochet.

Tuesday, August 16, 2011

Wigmaking for Tulah

 Tulah modeling her many wigs

I love dolls; all kinds of dolls.  My favorites are those of cloth and crochet, but there are some 'store bought' dolls that I cannot resist.  Small BJD's, and the lovely dolls of Helen Kish, fall into this irresistible category.

So when a dear friend of mine (hi Tomi!)  became seriously smitten by Helen Kish's small Riley, it reignited my interest in my own little Riley and Tulah, her friend.  But how to add a personal touch to a doll made by other hands in a far country?

How about a hand made crochet wig?  So, here is a wig making pattern for making your own wig for a very small doll.  Riley and Tulah have a head circumference of 4 1/4 inches.  The wigs are made of laceweight Mohair yarn, which works up to a gauge similar to size 10 crochet cotton.  This wig pattern can be adapted to other small dolls, particularly small Lati's  (White and Yellow)  and Fairyland dolls (Puki Puki and Puki Fee).

And, I think  Riley and Tulah are in for some crochet finery.  You know the drill, camisoles, pantaloons, dresses, sunsuits.  Should be fun!

Tulah says, 'enjoy the crochet!'


Saturday, August 13, 2011

Angel Cake, a Strawberry Shortcake friend

Sometimes it is fun to make someone else's pattern :-)   I have to thank Susan (aka BlueEyedGirl) for inspiring me to make this pattern, which I've had for several years.  I loved the way the dolls looked, but there were a lot of things I didn't like about the construction of the doll.  Susan reminded me that, if you don't like it, change it!

So, on her advice, I used an 'E' hook instead of 'G'  for the doll body, and used acrylic eyes instead of making them from felt (except for the whites).  This made my doll 10 inches tall, instead of 14.


Other changes I made to this pattern were to give the doll a wig cap, instead of attaching the hair to the hat, and also jointing the neck and arms.  To joint the neck, you need to work the pattern 'backward.'  That is, start the head at the neck edge (instead of the top of the head), and work the body starting at the neck (instead of the feet).   Her head is a bit too floppy, so instead of working three rounds of 10sc for the neck, next time I will only work two.

I also hinged the legs the way the Pocket Spirits are done, so this means the entire body from neck to feet is worked backward.

Her clothing is removable, but believe it or not, by using two hook sizes smaller for each part of the doll, the clothing patterns fit beautifully.  Instead of working the t-shirt in rounds, work them in rows and add buttons and button loops to the back.

I like her so well, I will probably make her a friend, if not all of them!  Thank you, Susan, for the great suggestions and your wonderful doll (See her here).

Enjoy the crochet!

Tuesday, August 9, 2011

Teacup Cottage

I love dollhouses; bet you'd never guess :-)

This little dollhouse for the Teacup Spirits is made from a Michael's CD cubbie.  I had this collecting dust in my sewing room for a couple of years, just waiting for the right inspiration to do something with it.  After making a few Teacup Spirits, I realized it was the perfect abode for them, and their friends :-)

I painted the house with a coat of Gesso, to give a nice surface to paint on.  Then used primary colors for the outside, and white for the inside.  For wallpaper, I used scrapbook papers.  The only problem here was deciding what papers to use, and not end up buying everything in sight!


I papered the back wall only (make it easy on yourself), by cutting a pattern for the wall, then cutting out the paper to the pattern.  I glued the paper to the back wall by watering down glue to the consistency of cream, then painting it on the entire wall.

The windows (both inside and out) are trimmed with narrow ric-rac around the curved edge, and some woven braid along the bottom.

Soft rugs are felt.  I planned to embroider a design on each rug, but got impatient.  The design is penciled on the bottom side of the rug, if I change my mind :-)


Full of dolls and furniture!  The furniture is made from one of my all time favorite things to play with...wood findings from the craft and hobby store.  The bed is made from four tiny clothespin pegs (courtesy of Joyce!) and craft sticks.  The clothespin pegs make the four posters, and the craft sticks the side rails, head and footboard, and stringers.

The parlour furniture is SO simple!  Two 1 1/4 inch wood blocks are the base of the chair; the back is made of craft sticks cut to size.  The chairs are painted and embellished with lace and felt cushions.

The table is a wood disk glued to a wood flowerpot; painted and trimmed with ric-rac.


You can see how simple the chairs are, and the bed was not at all hard to make either.  The mattress is a length of Warm&Natural batting folded three or four times to make it nice and soft.  A crochet comforter is in order, I think.


It isn't too early to be thinking about Christmas, and this little dollhouse would make a delightful Christmas gift for a lucky girl.  You could make a Christmas cottage, a Gingerbread cottage, a seaside cottage, a Tudor cottage.  The possibilities are limitless; let your imagination fly :-)

Monday, July 25, 2011

Guest Crochet Dollmaker - Joyce Yearsley

It is my pleasure to introduce you to Joyce Yearsley, also known as Dutzie on Flickr.  She is a wonderful crochet dollmaker, and Melanie, above, is the latest example of her lovely work and crochet innovation.   

Melanie has the most delightfully curly hair, made from crochet roses attached to a wig cap!  Simple as that, and yet so cute.  Joyce has shared a tutorial for making this wig cap on her Flicker site, and has also graciously allowed me to share it with you on my blog.  Click the link curly wig cap or find it on the left hand sidbar under Tutorials by Joyce.

This delightful doll also has another cool innovation...ball jointed arms and legs!  This is a technique you can apply to almost any crochet doll you are making; Joyce shows you how in her tutorial Ball Jointed Arms and Legs also shared here.

I am truly fortunate to know such a gifted and generous dollmaker.  Thank you, Joyce, for sharing your talents with us!

My latest Teacupsie Spirit used Joyce's curly wig cap tutorial to make her cute wig.  Crocheted from size 10 crochet cotton, I just made the unrolled roses a little longer for sausage curls.  What a great idea :-)

Enjoy the crochet!

Thursday, July 21, 2011

Welcome home, Atlantis. Farewell, Shuttle

All the photos on this page are from the NASA website:  www.nasa.gov


Shuttle Atlantis touched down this morning at 5:58 EDT, bringing to an end the Space Shuttle program, after 30 years of flight.

I watched entranced, 42 years ago yesterday, when Neil Armstrong and Buzz Aldrin landed on the moon.

As a child in grade school in the 60's, every Gemini and Apollo launch was watched on a TV wheeled into the room just for that purpose.  I was captivated by the space program, as so many of my generation were.  The space program was a ray of hope during the bitter decade of the 60's, and inspired me to study science and math, and go on to become an engineer.  


I recall holding my breath as Columbia landed for the first time, in 1981.   I watched dumbstruck as Challenger broke apart in 1986.

And I have been wholly amazed at the construction of the International Space Station.  Not only a marvel of engineering; not only like building a ship in the middle of the ocean from the keel up, but of the international cooperation between countries that only a few years ago were bitter enemies.


Interestingly, we cooperate better in space with former enemies and rivals, than we do within our own congress.

In space we speak a common language of committment, focus, dedication, and passion .  Surely this is a legacy that must be passed on to our children.  If we do nothing else as a country, we should inspire our children to dream beyond their horizons, to be passionate and focused and dedicated.  The space program brings out the very best in us, and shows us just what amazing things we can accomplish, when we work together.


Welcome home Atlantis!  Godspeed, NASA, on your next manned mission of discovery.  I hope the wait will not be too long.

Friday, July 15, 2011

Variations on a Teacup Theme

I'm a sucker for cute, tiny dolls; and these little sweeties are a wonderful inspiration for a variation on the Teacup theme :-)  By altering the basic Teacup Spirit pattern a very happy little crochet Teacupsie Spirit can be created.

You can find the pattern for the alterations here and on the left sidebar under Teacup Spirit Patterns.  She can even wear the Teacup Trousseau :-)

Enjoy the crochet!

Thursday, July 7, 2011

Tiny Teacup Trousseau


Now you can cloth your Teacup Spirit in a variety of outfits, from one basic pattern :-)  All of these dainty little costumes start with a bodice worked from side to side, my favorite way of making crochet doll clothes.  If you work in the back loops only, you get a neat ribbed effect, like the pretty pink camisole in the bottom right.  Or you can work in both loops for a vertical line.   You can also alternate colors for vertical stripe, as in top left.  Cap sleeves, lace sleeves, puff sleeves, or no sleeves.  It is a great starting point for your imagination!

The pattern is here, and also on the left sidebar under Teacup Spirit Patterns.

Enjoy the crochet!

Wednesday, June 29, 2011

Teacup Spirits

Here is a new pattern for an even smaller Spirit doll.  Teacup Spirits!  They are just under five inches tall, and inspired by my little Lati White Belle.    They have movable heads and shoulders, and pose-able limbs.  Once I got the pattern the way I liked it (took four tries!), it only takes about an hour and a half to crochet the little doll.


Tiny wigs from laceweight mohair, fingering weight yarn, or embroidery floss cap these little darlings off very nicely.

This wig was made from laceweight mohair/silk yarn.  A little goes a long way!  It is 7/8 oz and 195 yards.  I used a size 1 steel hook, and made chain loops for the curls.


This wig was made from fingering weight wool yarn.  It is 1 3/4 oz, 310 yards.  I used a size 1 steel hook, and this wig is removable.  If you make the cap a little smaller, I bet it would fit a Lati White or PukiPuki BJD :-)


This wig is made from embroidery floss, which is fantastic at this scale.  All those colors!  It takes three or four skeins of floss to make a wig; for this long wig it took three skeins.  To make crocheting the wig cap easier, I wrap the floss around a floss bobbin before crocheting.  If you need another skein to finish the cap (I did) just wrap it around your empty bobbin and tie it on to your working strand.  Make sure the knots are on the inside of the cap.


This cute, curly cap is made from worsted weight boucle yarn.  A bit big for this scale, and the stitches are not so easy to see, but still doable with a size C crochet hook.  And any mistakes are invisible in all these curls :-)


Click the link for the Teacup Spirit Pattern  or you can also find it on the left sidebar of this blog.


Think small!  Clothing patterns to follow :-)